Prerequisites
Before you connect the two platforms, make sure the following conditions are met:- In Nebuly, a Langfuse Trace maps to an Interaction.
- Each Langfuse Trace must contain exactly one user–assistant turn (the user question as the
input, and the final agent answer as theoutput). - Nebuly groups Interactions by the Langfuse
session_id. If a Trace lacks asession_id, the conversation cannot be reconstructed correctly. - Nebuly fetches only newer Traces based on their
timestamp. If you back-fill Langfuse with older timestamps, Nebuly will not import them. Ensure timestamps increase monotonically.
- Langfuse public key
- Langfuse private key
- Langfuse URL (only if you use a self-hosted instance)
Enable the integration
-
Open Settings
Log in to Nebuly and click the Settings icon in the top-right corner. -
Choose Integrations
Select the Integrations tab.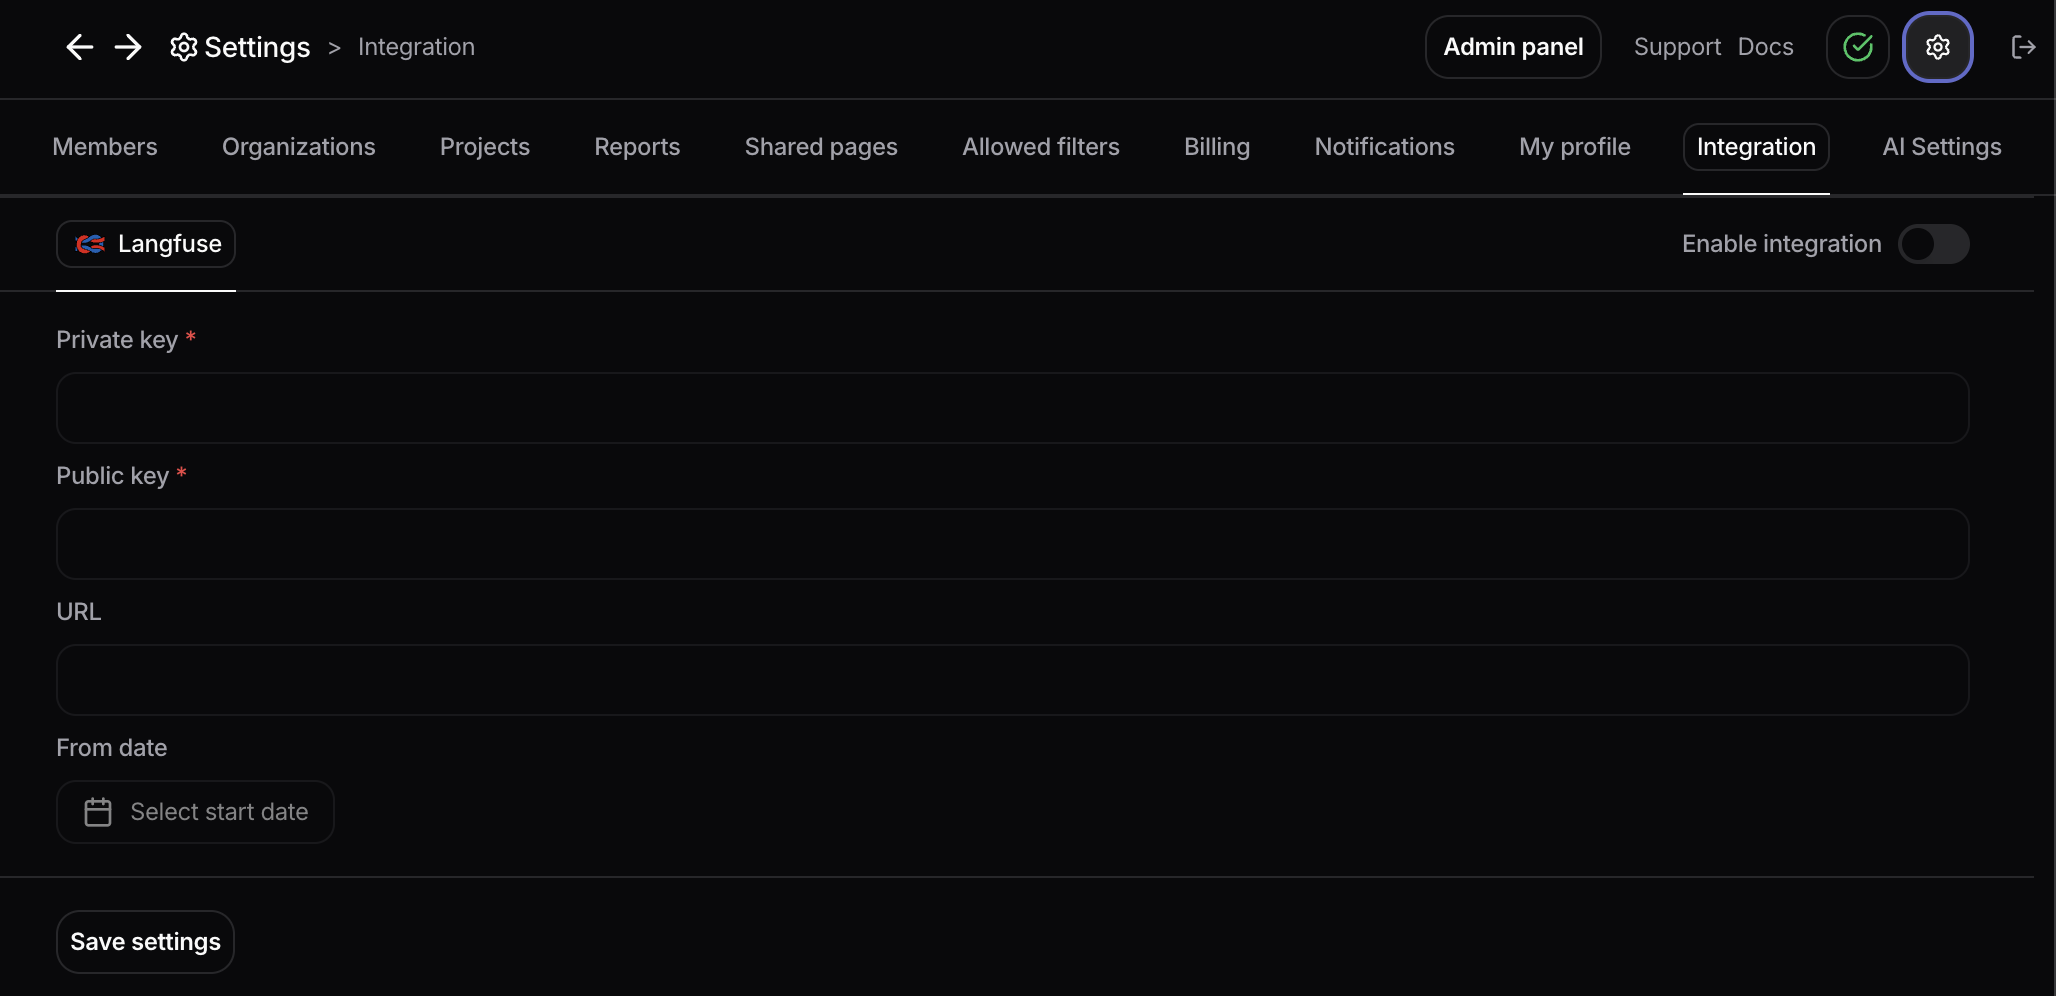
-
Configure Langfuse
- Toggle Enable integration.
- Enter your Public key, Private key, and (if self-hosted) URL.
- (Optional) Set a Start date to import only conversations created on or after that date. Leave blank to import all historical data.
-
Save
Click Save settings. Nebuly immediately begins syncing your Langfuse data.
FAQ
What should I expect to see after enabling the integration?Your Nebuly project will start populating with Interactions fetched from Langfuse. They appear on the Interactions page in Nebuly. When will my data appear?
There can be a delay of up to 30 minutes between the moment data is available in Langfuse and when it becomes visible in Nebuly. Subsequent updates follow the same polling interval.