

Shared Pages
The Shared pages section lets administrators manage all pages that have been shared outside the organization. Whenever a report, interaction, conversation, or other supported page is shared using a public link, it appears here. This provides a centralized view of all active shared pages, making it easy to review access and revoke links when needed.View shared pages
The table displays all active shared pages, including: name, permissions, creation/expiration dates and more. Use the search bar and filters to quickly locate shared pages.Disable a shared page
To revoke access to a shared page, open the ⋮ menu next to the page and click Disable. Disabling a shared page immediately invalidates its public link, preventing anyone from accessing it, even if they still have the URL.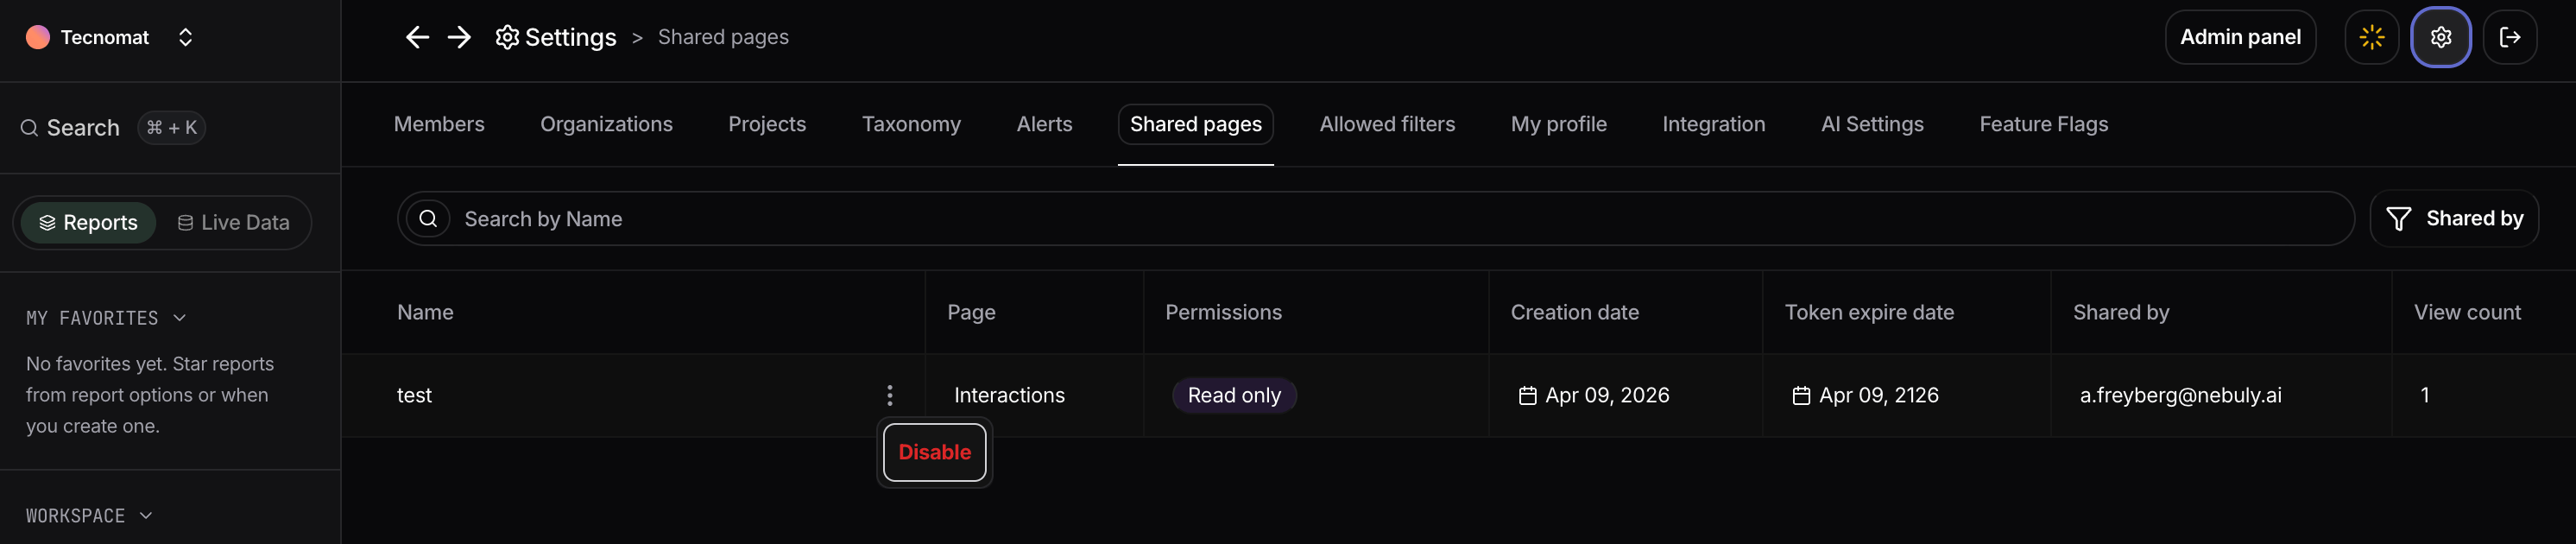
Allowed filters
The Allowed filters page lets administrators control which filters are available to users across the platform. By limiting the available filters for each role, you can simplify the filtering experience, expose only the most relevant dimensions, and prevent users from accessing filters that are not applicable to their responsibilities.Configure allowed filters
Select a role from the dropdown at the top of the page to manage its available filters. Filters are organized by category, such as interactions, conversations, user groups and more. Enable or disable individual filters using the corresponding checkbox, then click Save to apply the changes. Once saved, users with that role will only see the enabled filters when filtering reports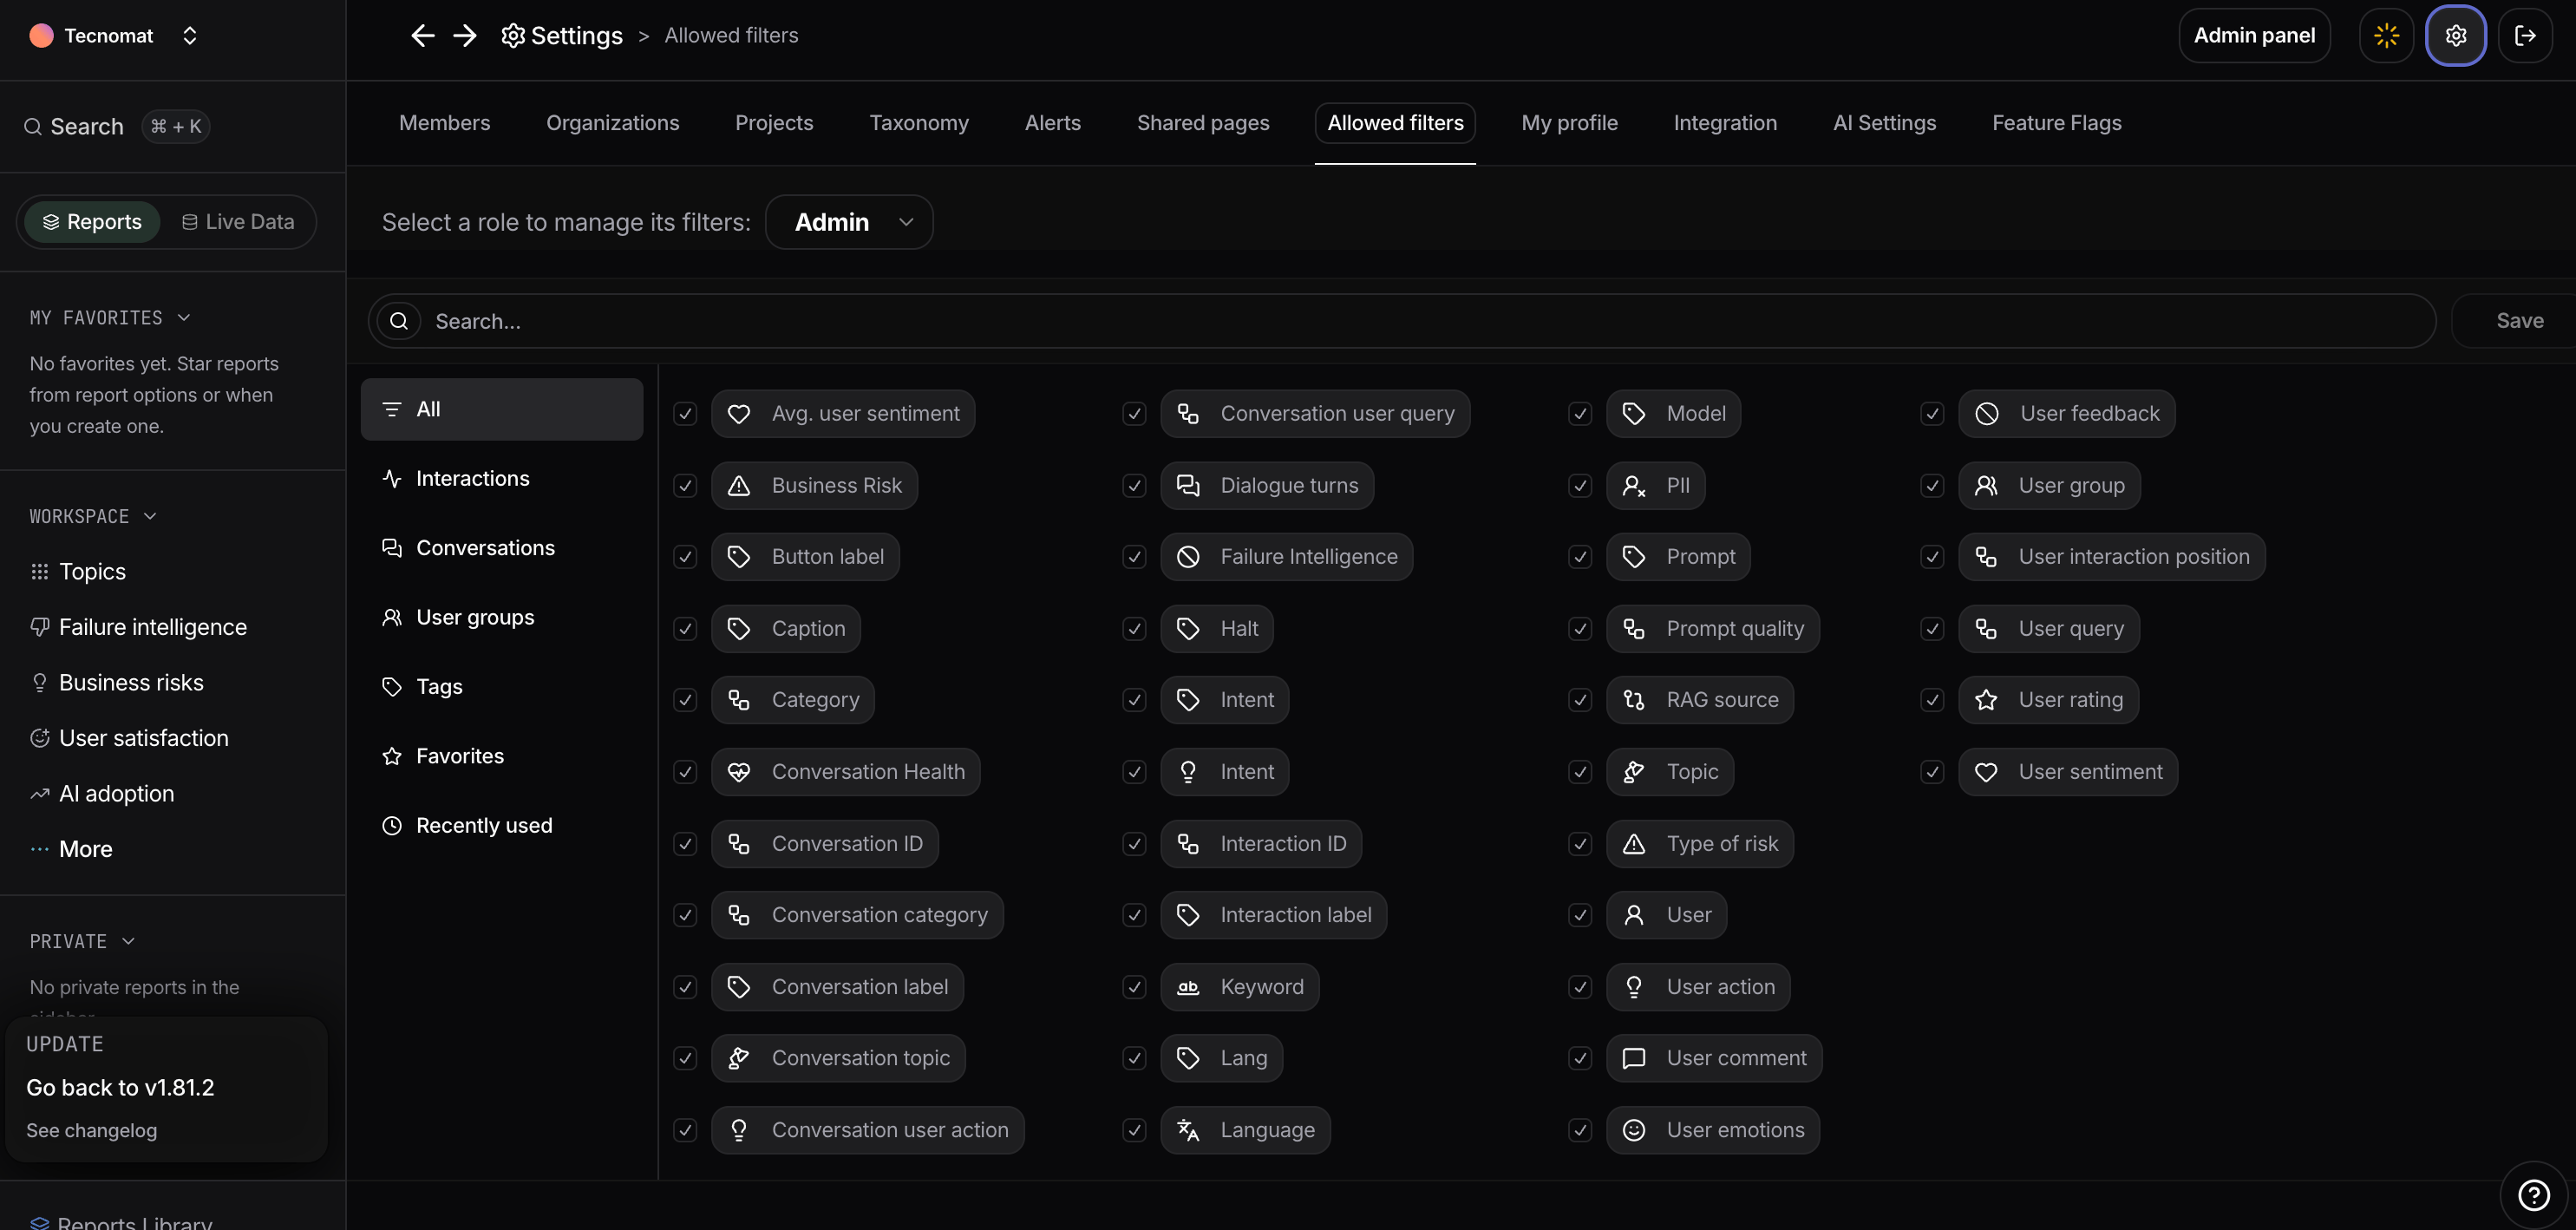
Integrations
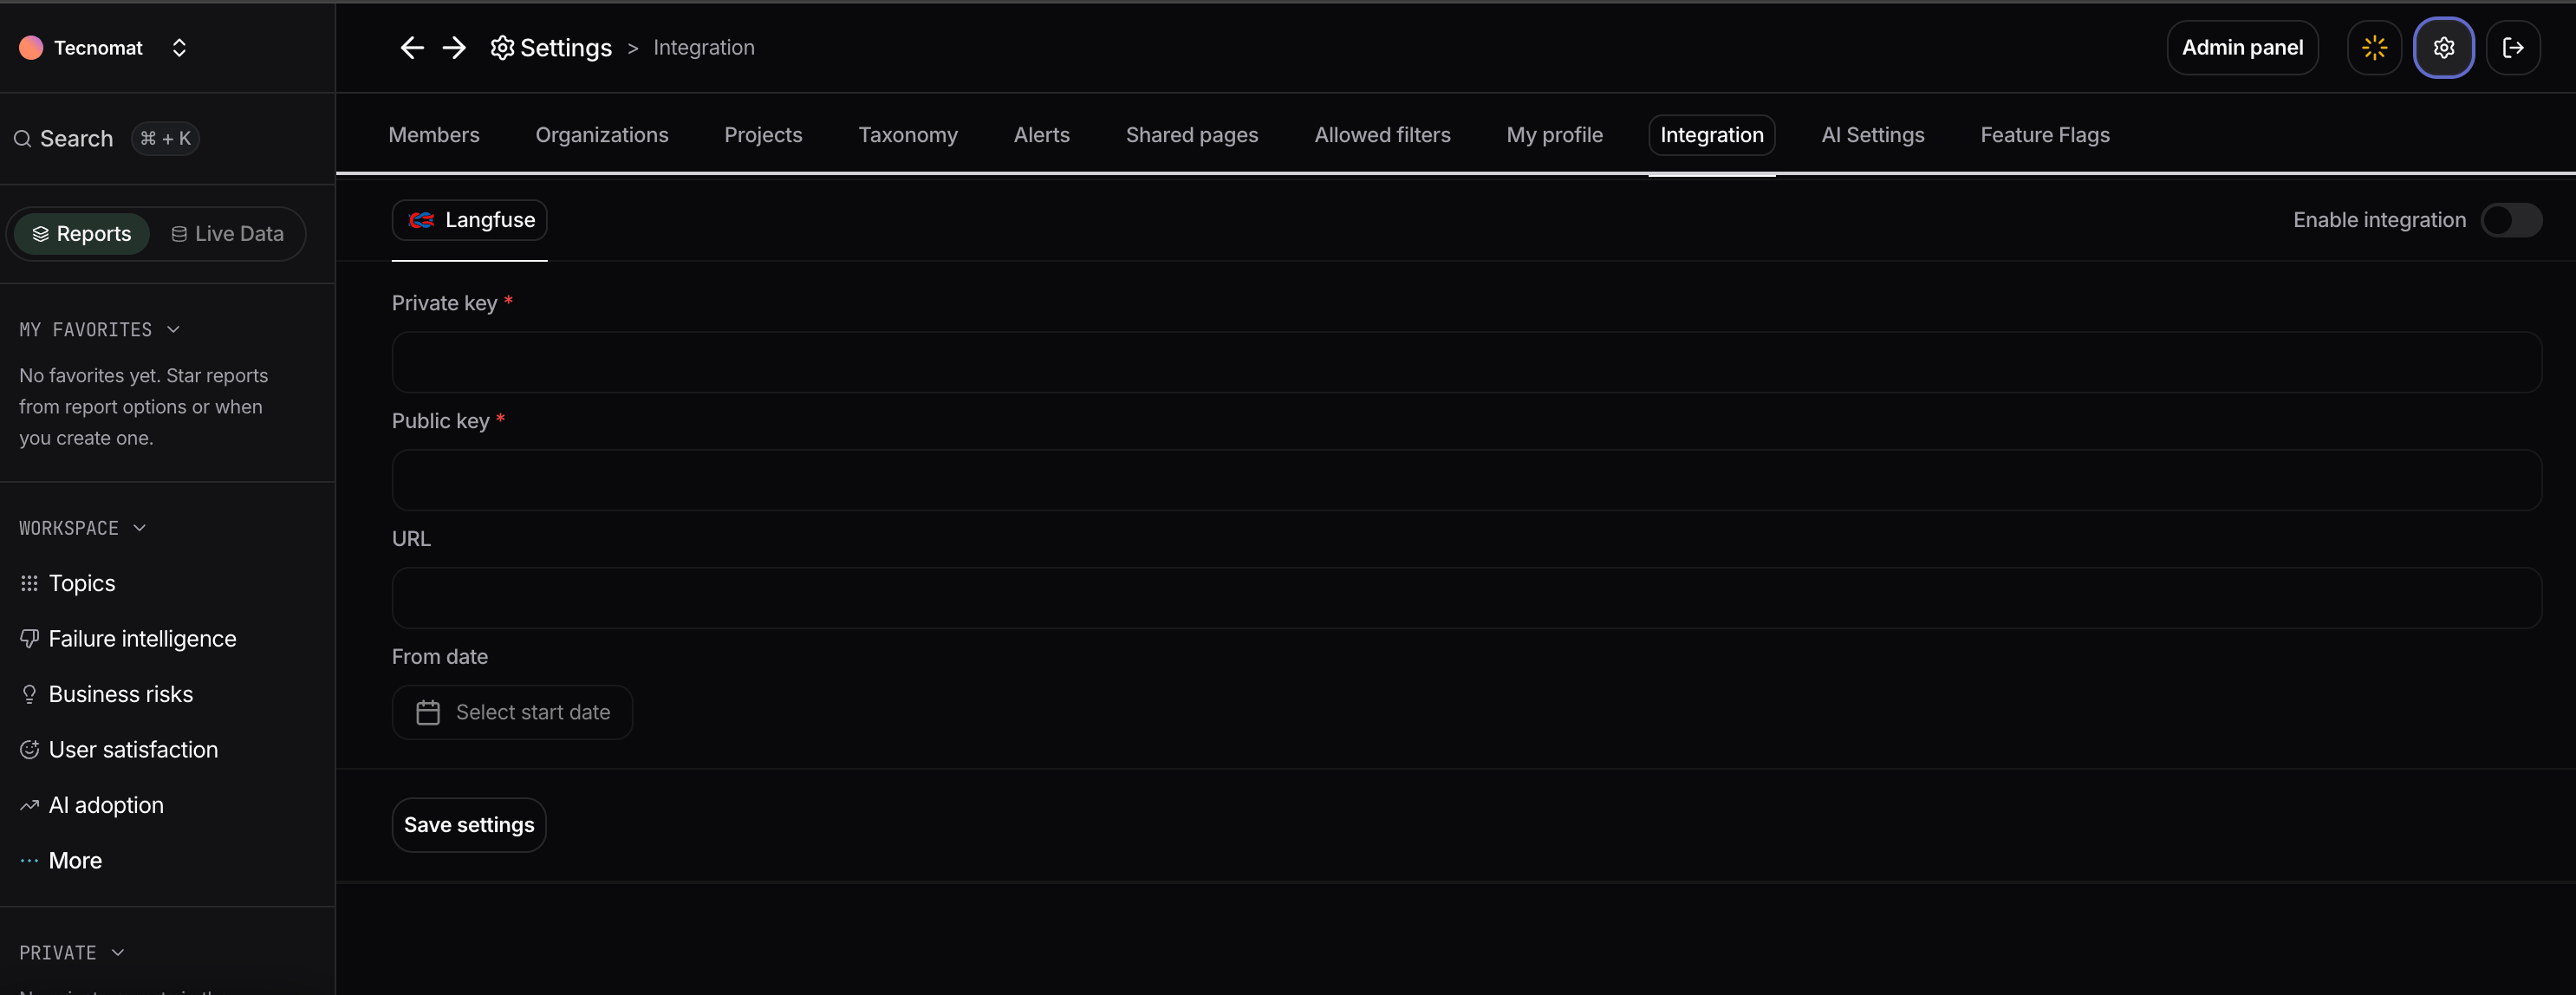
Nebuly integrates with Langfuse to automatically import traces and observations, allowing you to enrich your AI analytics with data collected in Langfuse. Once configured, Nebuly continuously synchronizes your Langfuse data, making it available throughout the platform for reporting, filtering, and investigation.Configure the integration
To connect Nebuly to Langfuse:- Enable the Langfuse integration.
- Enter your Private key and Public key.
- Specify your Langfuse URL if you are using a self-hosted instance (leave the default URL for Langfuse Cloud).
- Optionally select a From date to define when Nebuly should begin importing historical traces.
- Click Save settings.
My profile
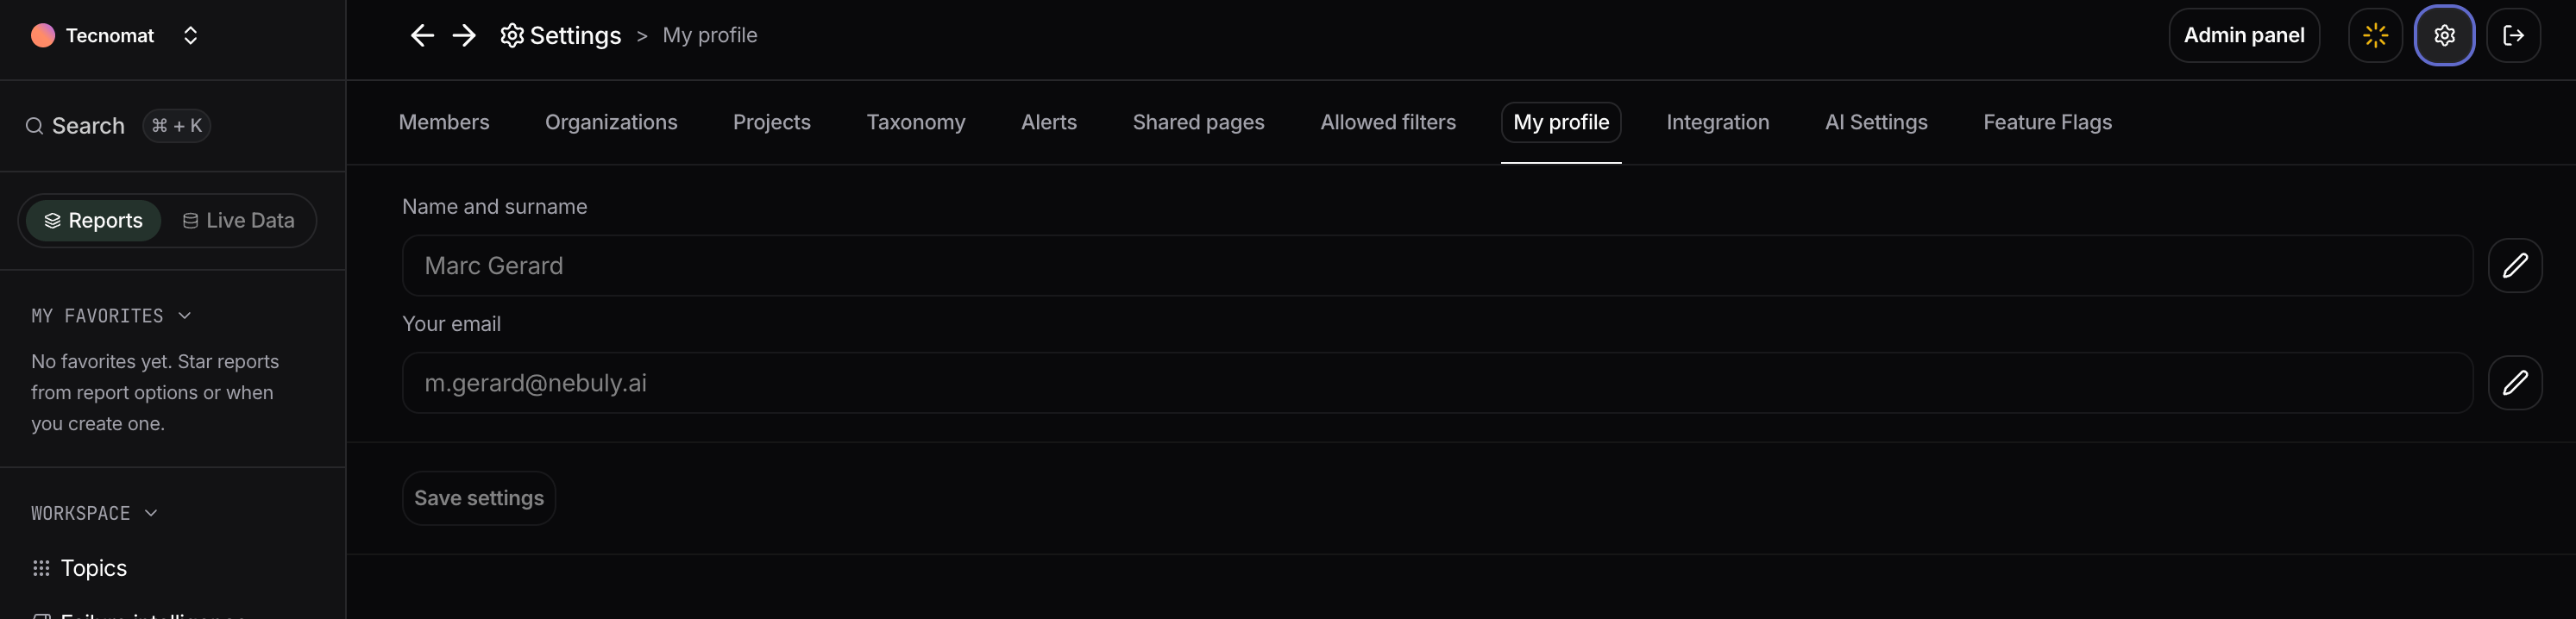
The My profile page lets you manage your personal account information. From this page, you can update:- Name and surname – The name displayed throughout the Nebuly platform.
- Email address – The email associated with your Nebuly account.
Translations
Interactions in Nebuly can be translated into a language of your choice. This lets you review and analyze conversations that took place in languages you don’t read, without leaving the platform.Configure the translation language
Translation is configured per project. Go to Settings → Projects, click the three-dot menu next to the project you want to configure, and select Translation Settings. From there you can choose the language interactions should be translated into.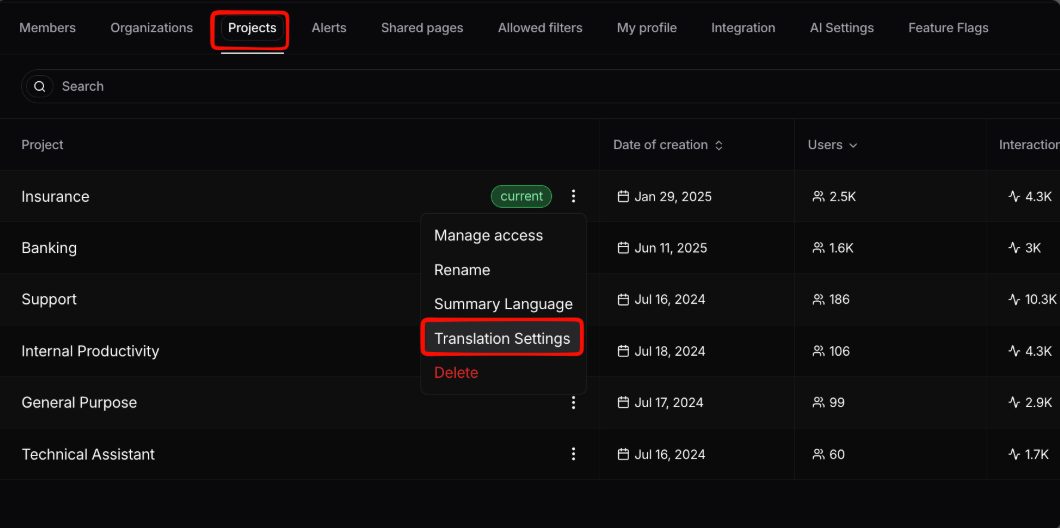
Opening Translation Settings for a project from Settings → Projects
Translating an interaction
Once translation is configured, you can translate from the interaction details page using the translation button. You can either translate the whole conversation or a single interaction.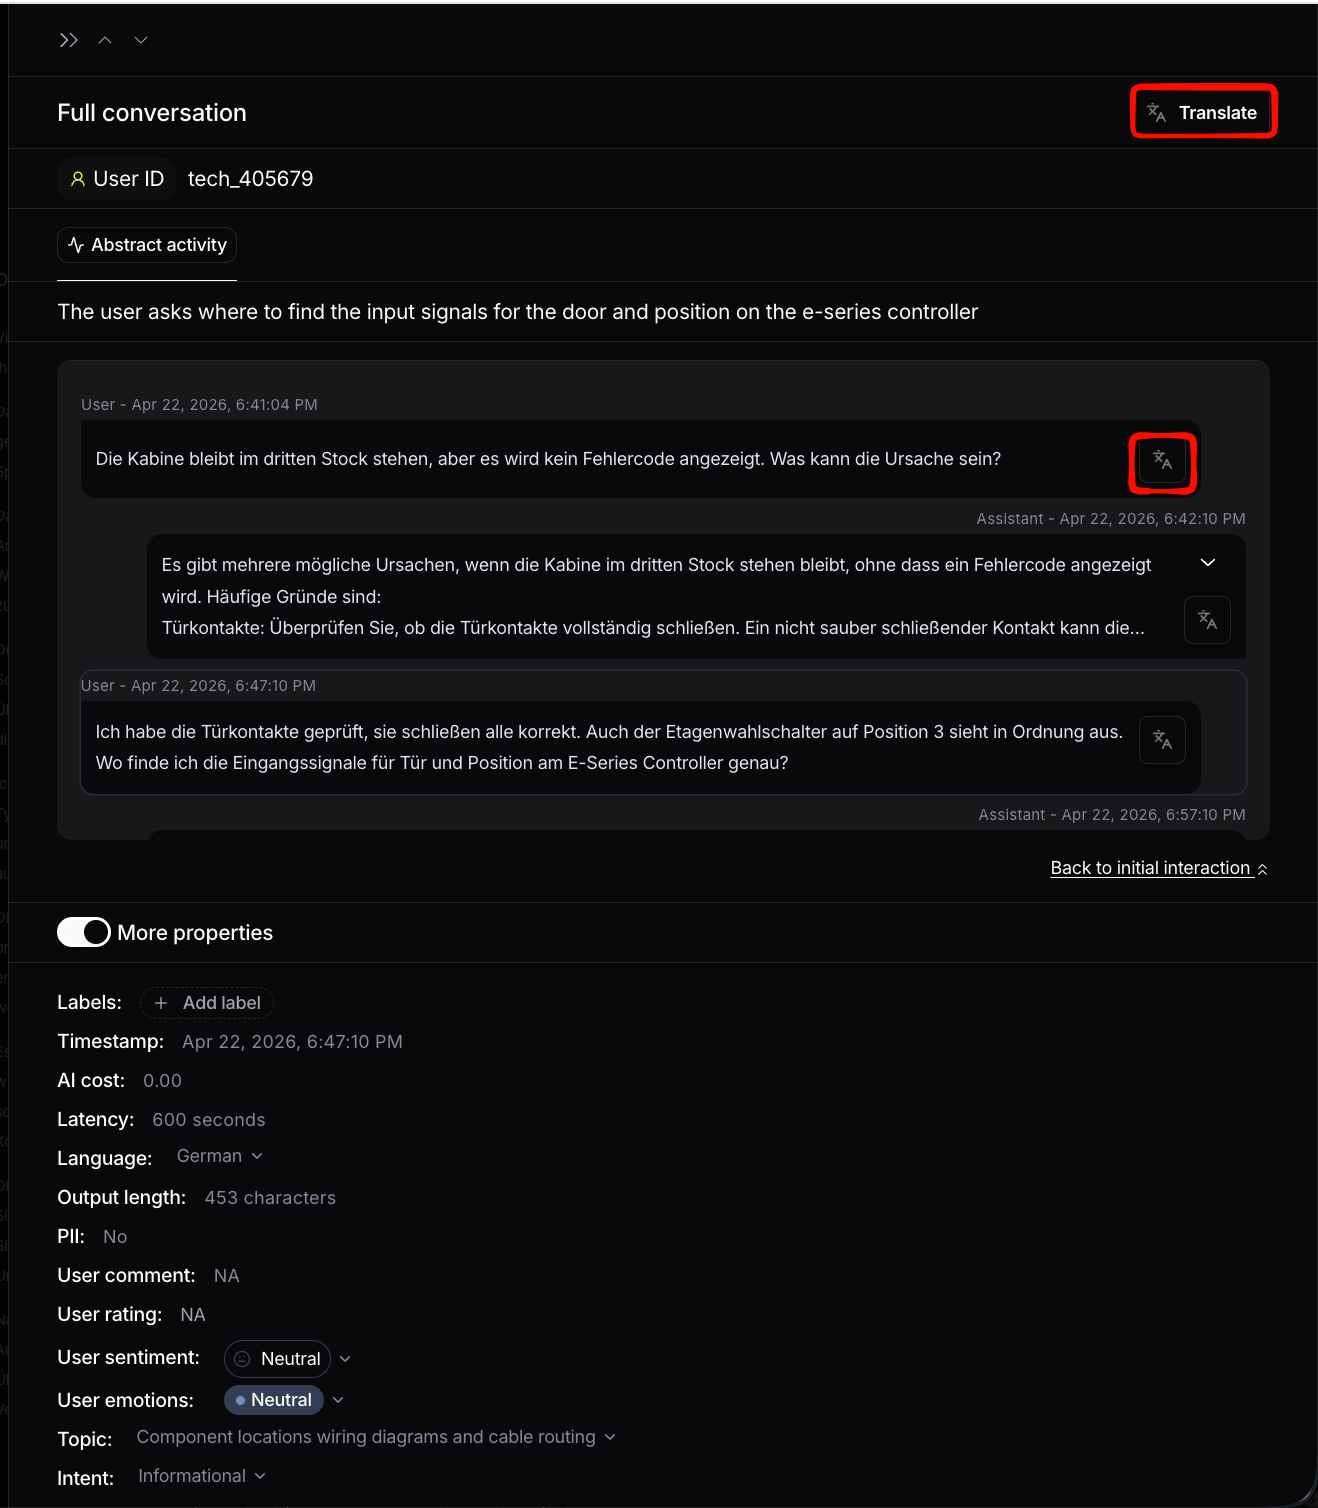
The translation button on the interaction details page